App development
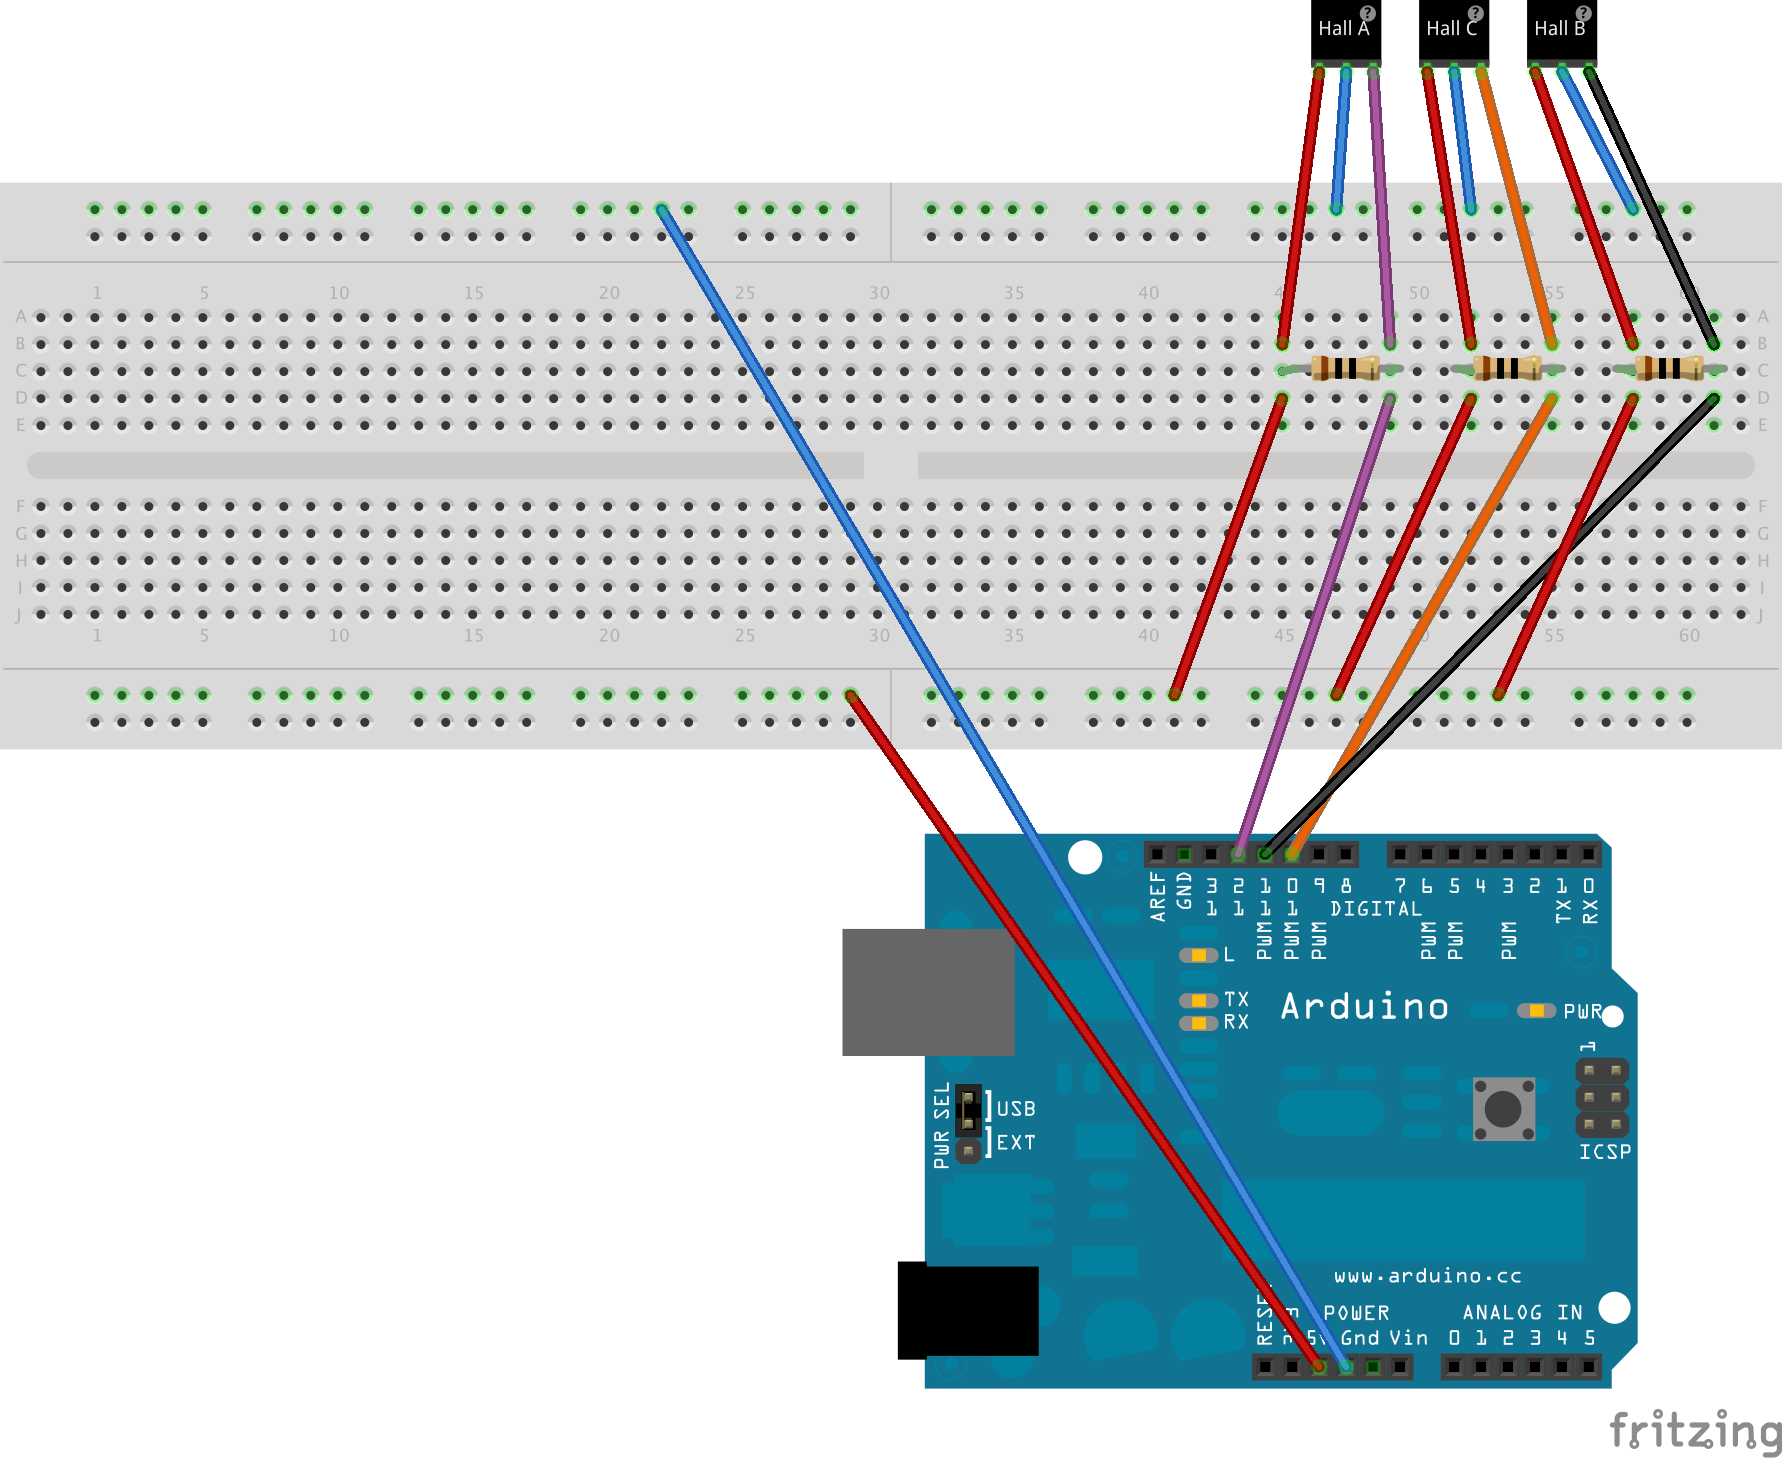
At the very bottom of the app are three hall effect sensors and a magnet stuck on the wheel. From this connection it’s possible to establish when and how often a rotation happens, and so the speed of the user running/walking on the wheel.
The mechanism is very simple: a magnet gives an input each time that passes by a hall effect sensor. However, a single sensor wouldn’t be enough, a certain point of the wheel might pass in front of it without it being necessary to do a complete rotation, the wheel might oscillate for example. Therefore, I posed three sensors
(A, B, C) next to each other at the base of the wheel, as illustrated below.
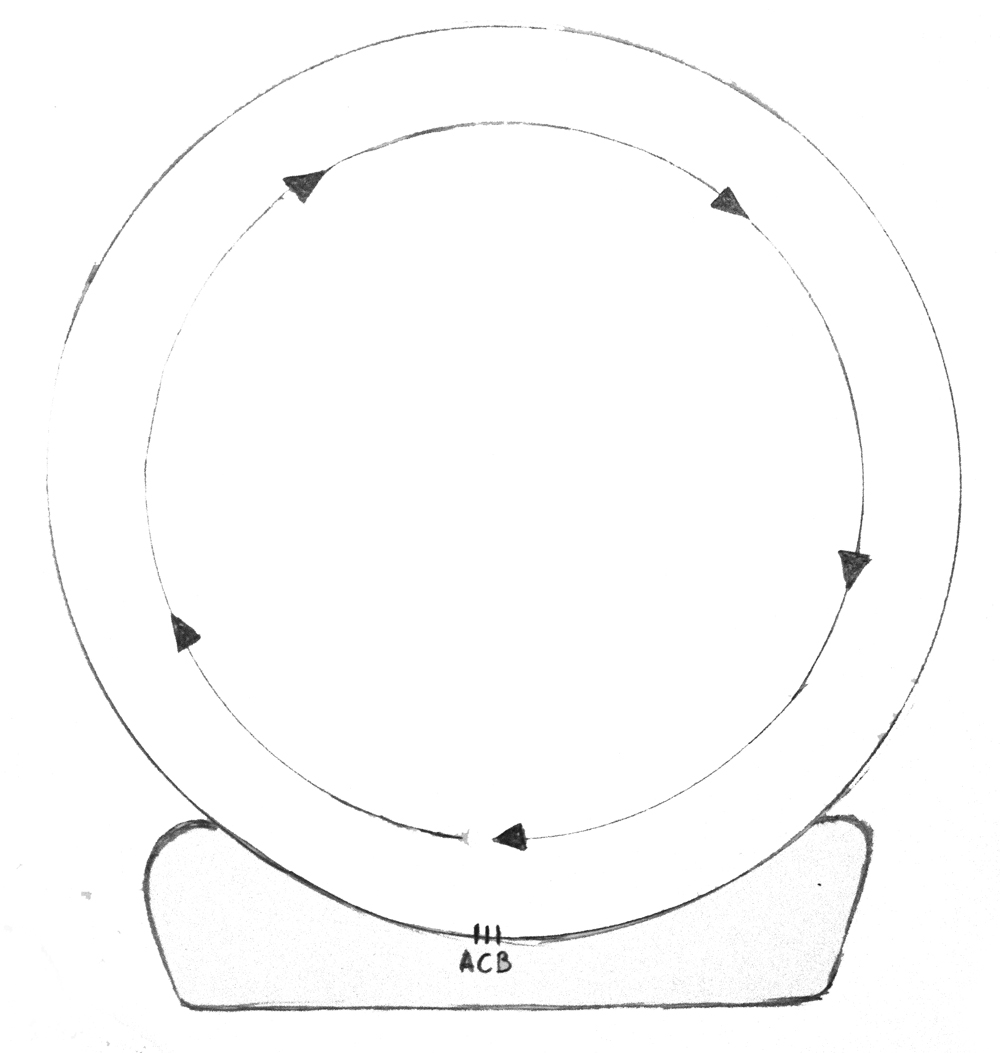
In this way I will count a rotation only when the magnet passes A-B clockwise.
C, posed between A and B will simply stop the timer.
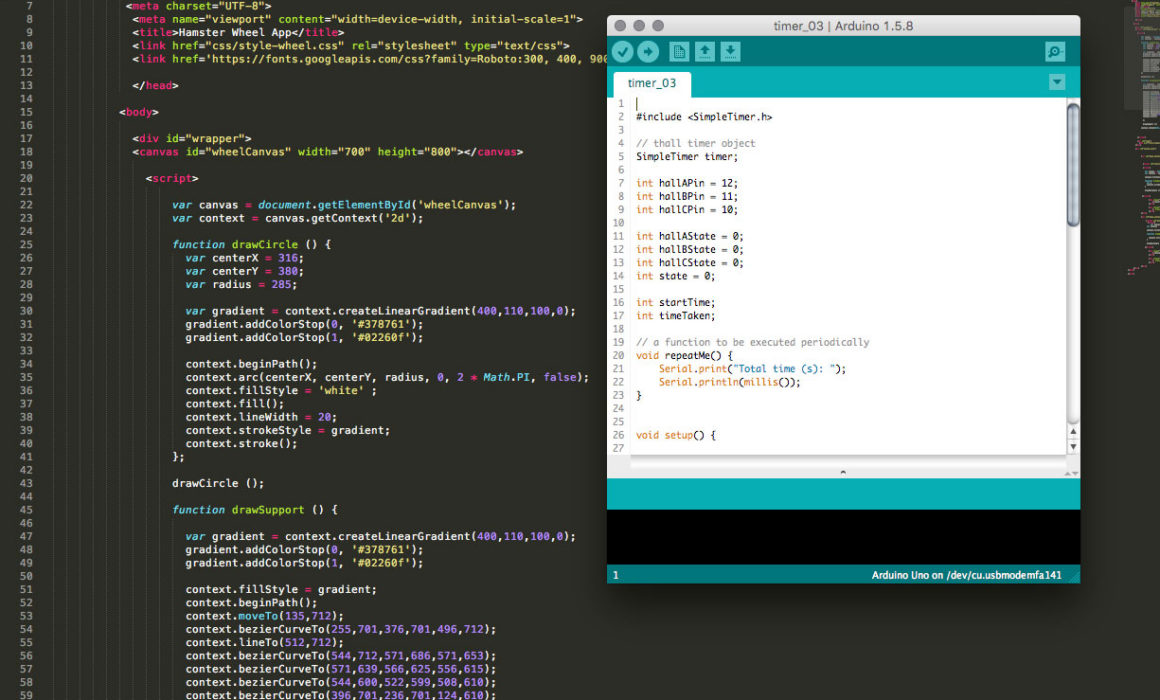
Here it’s the Arduino code.
The values to take in consideration are reported by two timers:
TA = takes time of each rotation, counts A-B clockwise
TB = takes the overall time. It counts the time from the beginning of the interaction = 0 + the first time value imported by TA, till the end of the interaction = 10 seconds after the last input received by TA. It will be assumed that if there have been no rotations for 10 seconds the user has concluded its performance.
Process:
1 – Time is taken for each wheel rotation and multiplying that by the wheel circumference, speed is obtained.
2 – As soon as the performance finishes the times of each rotation are added up, giving the total performance time.
3 – Users are asked to enter their name and weight.
4 – Weight entered replaces the default weight of 60kg (see calculations) and calories are recalculated.
5 – New data are placed in the leaderboard.
![]()
Arduino
– will basically feed only the time taken each rotation.

Node.js
– creates the connection between the Arduino and the web browser.
– exports rotation speed value and does the calculations to obtain Energy Produced and Calories Burned values.

Socket.IO
– allows a two way communication between user inputs on the website and the Javascript code.
![]()
HTML5
– canvas are used for the animations (bars rising and wheel turning) on the webpages illustrated in the previous post.
Form and leaderboard are built in HTML and data is fed through Javascript.
At this stage I finished the Arduino part and working on the connection with Node.js and Socket.io, so after having quickly learned the Command Line on Codeacademy I did some tutorials to get a bit of familiarity with Node.js and understand its mechanism.
Furthermore, I found some libraries which I could eventually use: Johnny-Five, Meteor or Express.
Finally, I started to build the website in HTML, which was supposed to be the easy part for me as it’s what I can do the best, however it was quite tricky to draw the wheel in the HTML5 canvas and animate it.
Also for that I used three tutorials (Mozilla, HTML5 Canvas Tutorials and William Malone and combined the results.
Here it’s how it looks like, code and result.